General: Connecting Microphones
About
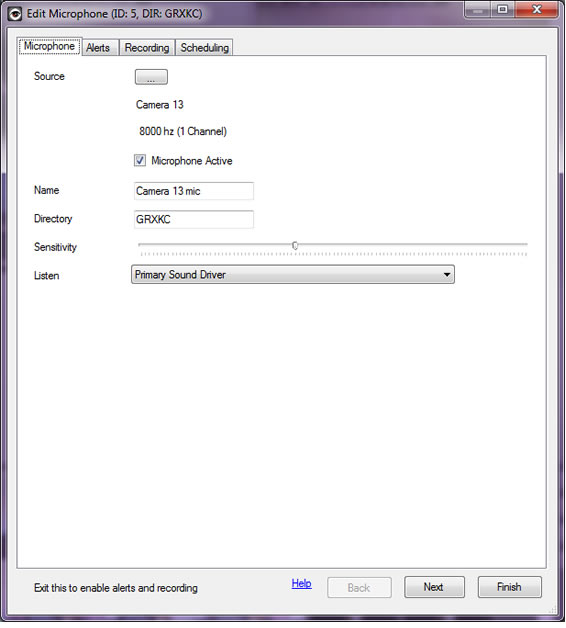
Once you have selected an audio source iSpy will show you the main configuration screen. You can get back to these settings at any time by right clicking the microphone on the iSpy Surface and clicking "Edit".
Main Settings

Name: Once you have specified an audio source iSpy automatically sets a name for the microphone in the name field to match. When using a VLC source this name frequently has usernames and passwords in it so check the name before continuing. It's a good idea to give the microphone a location based name like "Office Mic" or "Front Door Mic" as this will help differentiate the feeds when viewing them later.
Active: The microphone active checkbox is a live control - that is it switches the microphone on or off immediately without waiting for you to click Finish. There are quite a few live controls in these pages.
Description: The description field used to be used on the website but isn't any more - it's entirely optional - it can help if you want to keep track of any notes about the microphone or anything else.
Sensitivity
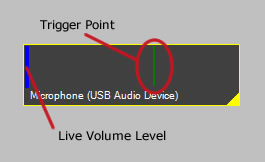
 Sensitivity Slider: This sets the trigger level for sound detection which controls all recording and alerting functions. As shown here the microphone provides a live view of how much sound is being detected along with exactly where the trigger point is. The sensitivity slider is a live control, as you move the slider to the right (more sensitive) the trigger point moves to the left and vice versa.
Depending on your microphone model and placing you will need to play with these setting to ensure that sound alerts are not continuously being reported due to signal or background noise. This can take a bit of experimentation. The control affects the microphone in real time and the microphone will flash red when sound is detected, so adjust the slider until you are happy with the level of sound required to set off an alert.
Audio Conversion Settings
iSpy uses FFMPEG to convert the generated ".wav" files to ".mp3" or ".fla" files that can be played back in the web browser. We strongly recommend using the MP3 option as these can be played back in either the flash player or HTML5 capable web browsers (like the Safari on the iPhone and iPad).
Usually the settings in this panel can be left as they are. If you want to tweak the settings and modify the command then refer to this pretty comprehensive guide. If you don't want iSpy to convert the audio clips to a web format then clear the text in the Command box and uncheck the Delete WAV flag (you will be unable to use iSpyConnect to listen to the clips if you do this).
Delete AVI This checkbox tells iSpy to delete the WAV file after conversion to FLA or MP3. If you want a high quality copy of the clip then uncheck this option. Keeping the WAV files can use up a lot of disk space.
Listening Live
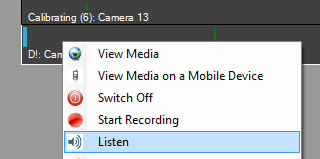
 You can listen to any connected microphone live through iSpy or iSpyConnect. Right click the microphone and click "Listen" in iSpy or click on the microphone icon in iSpyConnect. Due to the buffer there will be a short delay in the sound being played back. Take care not to listen to live microphones near your speakers to avoid feedback.